At a glance
Start with plain woven fabric, a hoop, stranded floss, an appropriate embroidery needle and scissors. Practice a short line of backstitch before a curved stem and leaf outline. Our two-strand suggestion is a starting exercise, not a rule for every fabric and needle.
On this page
An original practice project with schematic illustrations; no hands-on product test is claimed. Source checks: 2026-10-19.
Keep the first sampler deliberately small
This practice piece uses a straight row, a curved stem and two simple leaf outlines. It is a technique sampler, not a counted cross-stitch chart. Draw your own small arrangement inside the hoop; none of the diagrams is a scale pattern.
Gather plain woven fabric large enough for your hoop, stranded embroidery floss, a needle appropriate for that fabric and thread, scissors and a removable marking tool if you need one. Test the marker and its removal instructions on an offcut before marking the final piece. Store the needle securely between sessions.
Understand the thread and stitch first
DMC's stranded-floss guidance explains that strands can be separated. For this exercise, try two strands and adjust after a small sample if the combination is awkward. The hoop should hold the working area taut without deliberately distorting the weave; consult the hoop instructions for preparation.
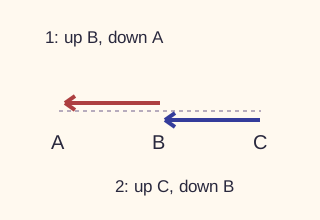
Backstitch makes a connected outline. In our diagram, A, B and C are successive positions from left to right. Bring the needle up at B and down at A; then come up at C and go down at B. Repeat that backward surface stitch while moving the new exit point forward. The drawing is schematic, not a measured stitch-length prescription.
References: DMC US: using stranded embroidery floss, DMC US: using an embroidery hoop, DMC US: embroidery back stitch.
The project, one small step at a time
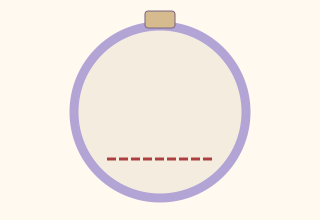
1. Prepare a small practice area
Secure the fabric in the hoop according to its instructions. Separate a manageable length of floss into the strands for your trial, and thread the needle. Use a small starting knot on the back for this informal practice piece. Keep the needle path clear of the hand holding the fabric.
2. Work a short straight row
Mark three or more evenly spaced positions lightly if helpful. Start up at B, go down at A, come up at C, then go down at B. Continue with similar small stitches. Pull each stitch until it lies against the fabric without tugging the fabric into a crease.
3. Turn the row into a stem
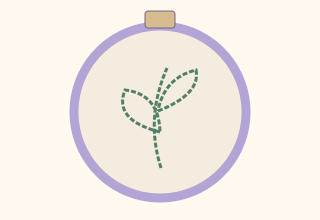
Use the same stitch to follow a gentle curve. Shorten the stitches where the curve changes direction if that helps you follow it. Add a small leaf outline on each side of the stem. Stop at the outline; filling the shapes can be another exercise.
4. Secure the thread and review
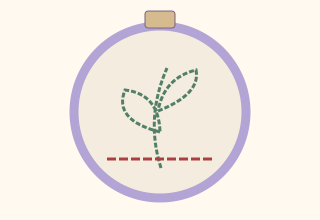
On the back, pass the remaining thread under several existing stitches to secure this practice sample, then trim without cutting the stitches. Remove the hoop when you pause and store the needle safely. Look for one place where a lighter pull or shorter stitch might help next time.
If the first attempt gets awkward
- The fabric puckers
- Ease the pull on subsequent stitches and check hoop tension. Do not pull harder to hide uneven spacing.
- The thread tangles
- Pause before tightening the knot. Let the thread untwist and try a shorter working length on the next row.
- The curve looks angular
- Try shorter stitches around the bend. A sampler is a place to compare choices, not a test of perfect symmetry.
Put the supplies to work
Sources and evidence limits
- DMC US: using stranded embroidery floss
Checked 2026-10-19. Manufacturer guidance on separating stranded floss. Our two-strand exercise is an editorial starting choice.
- DMC US: using an embroidery hoop
Checked 2026-10-19. Manufacturer hoop preparation guidance; no source diagrams reproduced.
- DMC US: embroidery back stitch
Checked 2026-10-19. Manufacturer technique reference for continuous outline stitches; all project composition and illustrations here are original.
Manufacturer information describes published specifications or instructions. Our buying choices and original exercises are editorial judgments. We have not tested these products. Prices, stock and comparative performance are not established by these notes.